NHI Headlines
The First Mouth Piece of the Carbon Moulding Equipment Successfully Installed -NHI is applauded once again
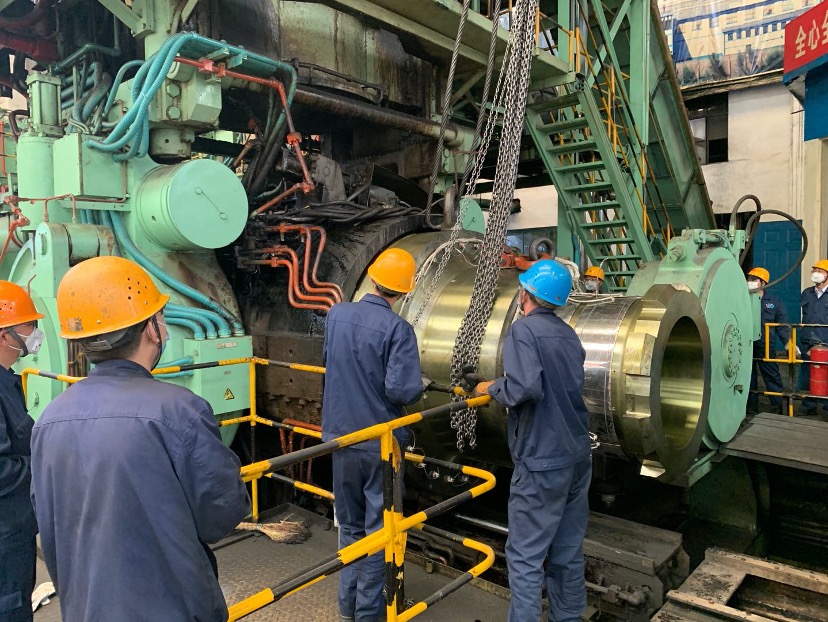
“I appreciated it very much that NHI has made the mouth piece with a diameter of 784mm for Fangda carbon moulding plant. All dimensions are accurate and the installation was successful in one time!” On June 6th, a text message from Mr. Zhang Yixiang, director of Fangda Carbon Moulding Branch, was transferred to the large component machining workshop of NHI and other branches participated in this project, which had made the cadres and employees participating in the project have a happy smile on their faces.
“This Japanese moulding equipment requests very high precision. The previous mouth piece couldn’t be assembled in one time and had to be rectified repeatedly. But this time, the mouth piece manufactured by NHI had been successfully installed in one time. The brother enterprise is so professional that we have more confidence in the future." Mr. Zhang Yixiang said happily.

It is learned that Fangda Carbon New Material Co.,Ltd. (Fangda Carbon Ltd. for short) and NHI are both subordinate enterprises under Liaoning Fangda Group. In order to cooperate with Fangda Carbon Ltd. to promote transformation and innovation as well as seize the high-end electrode markets home and abroad, NHI well planned, carefully arranged, and successfully completed the φ 784mm mouth piece which was suitable for the 40MN horizontal carbon moulding equipment in Fangda Carbon Ltd. This part was successfully installed in one time after arrived at site. The cooperation between the two brother enterprises showed that NHI had made new achievements in collaborative development with group industrial chain enterprises since joining Fangda Group.
Formulate and Arrange Processing Plan in Advance by "Tackling Team"
The mouth piece was NHI’s first processing project for carbon moulding equipment and was designated as the approval project by NHI. Because the piece was difficult to process, the shape was complex, the dimensional tolerance and geometric tolerance requirements were extremely strict, the precision requirement was high, and the delivery schedule was tight, with the strong support of the production command center, the large component machining workshop carried out the thorough deployment and reasonable arrangement 20 days in advance, and set up a product "tackling team" with the participation of the backbone of the production, technology and processing workshops. The technical department of the branch took the lead in holding a pre-production technical preparation meeting with participation of production, technology, processing, auxiliary and other departments, carried out technical preparation in advance, implemented key equipment, formulated a variety of processing schemes, implemented the tooling molds, cutting tools and measuring tools used in the processing, and did a thorough overhaul of key research equipment in advance. Leading cadres of the large component machining workshop connected workshop team, solved the processing problems in advance, and did a good job in the preparation of key links before processing, so as to ensure the smooth processing.

Strengthen Technical Preparation to Ensure Delivery Progress
The large component machining workshop strengthened the technical preparation, studied and formulated the workpiece processing method in advance, improved the workpiece clamping scheme, and comprehensively tracked the process by relevant technical personnel, timely handled the problems and difficulties in processing, and ensured the processing progress.
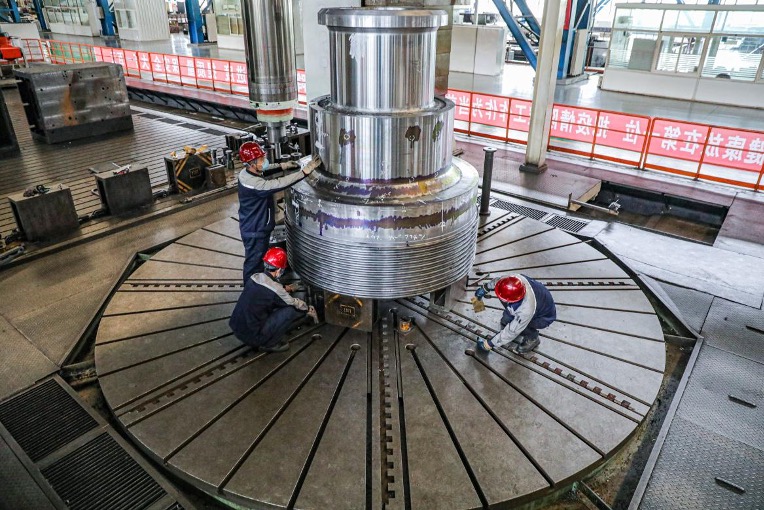
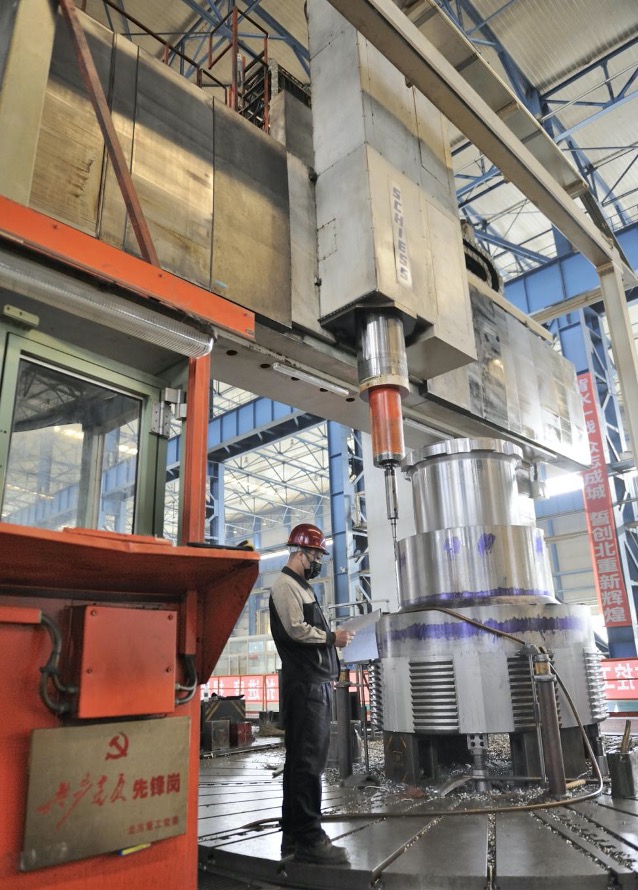
During the clamping of the mouth piece on the 6.3m vertical lathe for machining of large end, the mouth piece could only be fixed by the first step of the small end, and the second step and the large end were in the suspended state, which was easy to cause safety hazards during lifting and processing. The tackling team modified the clamping method in lathe process.They proposed to use the clamping jaw seat and clamping pad of the vertical lathe workbench to perform clamping in the second section of the outer circle welding block. Such method had been verified that it was not only convenient for workpiece clamping but also greatly saved clamping time.
Due to the difficulty of workpiece clamping, the tackling team proposed the scheme of segmented semi finishing with MT flaw detection. Firstly, to carry out semi finish machining of large end, then MT flaw detection; after the inspection, to finish all parts of the large end; Then after turning the workpiece over, to carry out semi finish machining the small end, and then flaw detection. In this way, on the premise of ensuring the quality of the workpiece, the time required for turning over the workpiece and secondary clamping was saved, and the production cycle of the vertical turning process was greatly shortened.
In the process of machining, the tolerance of saw tooth ring groove on the surface of the workpiece was strict. Because the cutting tool alignment method couldn’t be applied in the actual processing, after careful research, the saw tooth ring groove processing method was improved. After rough machining the ring groove, the upper ring groove was finished with a shaped R cutter. When passing the sample test, this groove was used as a reference to finish the remaining grooves at equal intervals. The purchased wear-resistant forming R blade was used to finish all the ring grooves in one time, thus avoided the deviation of secondary tool alignment caused by tool damage in the processing process.
Mobilized Team Members and Equipment to Improve Process Efficiency
The weight of the blank of the mouth piece (spare part) was more than 20 tons, and the weight of the finished product was more than 18 tons. Moreover, the workpiece had a special shape, so it was very difficult to lift, turn over and clamp.
In order to improve the processing speed and delivery schedule, the large component machining workshop adjusted the shifts of key machines and spared no efforts to process. According to the processing requirements, the key machines in the workshop, φ 6.3m vertical lathe and the 7-axis 5-linkage CNC lathe milling machine, were arranged for processing.The two machines cooperated with each other, and operated in three shifts with no shutdown for 24 hours, so as to ensure the connection of the workpiece processing. If there were problems in the process, the three shifts could communicate with each other at any time through telephone conference to solve the problems promptly. Leaders of the tackling team often communicated with the workers of front line, tracked the processing progress, made plans and trial processing for difficult parts in advance, demonstrated whether the scheme was feasible, and effectively improved the processing efficiency.
Brainstorms Help Solve the Difficulties and Improve Production
In the rough machining of inner and outer surface by 6.3m vertical lathe, due to the complicated angle of the inner and outer surfaces of the workpiece and the large amount of blanks, the dimensional tolerance is only 0.02mm. After repeated research and exploration, the operator Mr. Li Wei, Mr. Zhang Bing and Mr.Gao Feng, in the absence of a special tool, used turning tool repeatedly to grind a special angle and to directly process the surface slot. The sharpened turning tool increased the depth of cut and greatly increased the processing speed. There were 30 deep inclined holes with a diameter of 35 × 350mm and straight hole of φ 35 × 750mm on the surface of the mouth piece spare part, which need to be drilled and reamed. It was very difficult to operate the machine, and the reamer would break in the long hole if there was a slight carelessness, which was time-consuming and laborious. Facing these difficulties, the three operators of the 7-axis 5-linkage CNC lathe milling machine, worked half a month ahead of time to study the suitable processing scheme.They ground the lengthened drill bit by hand, tested repeatedly on the surface of the same material in advance, and directly used the long drill to process deep holes. After verification, it not only ensured the accuracy requirements of deep holes, but also greatly improved the processing speed of workpiece. As a result, all deep holes were processed quickly on the mouth piece, meeting the process requirements. The root removal of the arc groove on the surface of the workpiece was also difficult. Because both sides were threaded, the processing was difficult and the coefficient was high. The tackling team, technicians and equipment operators had repeatedly studied the processing methods, but still failed to meet the processing requirements. However, they didn’t give up. After repeated tests, Mr. Wu Wenyuan, Mr.Tong Hailong and Mr.Zheng Suifu, the three operators, used the macro program programming. After the milling cutter was positioned and centered, the cutter head blade was used for rapid feed. After a section of processing was completed, the disc was rotated for 0.1 degree to continue cutting. After repeated feeding, the arc groove was machined, which met the technical requirements.

With the joint efforts of the cadres and staff of the large component machining workshop, the first mouth piece of the carbon moulding equipment made by NHI successfully machined and manufactured, and had passed the acceptance and installation in one time, which was highly praised and applauded by brother enterprises. Facing the complex new products, all staff broke through themselves with the spirit of "tackling difficulties", improved efficiency by "innovation and practical work", and offered a generous gift to the company's theme activity "comprehensive cost reduction and hard work for 100 days".